
To show you my "Very Homemade Christmas" post! It's gonna be a good one! Coop and I have "moved on up" to a precious little rent house. LOTS more room to stretch out. And even better, lots of room to decoraatteeee!!!!!
In the meantime, prayers would be appreciated. School's out Friday. Kids are insane already today (Wednesday). They were insane a week ago. There's not enough Ibuprofen in the world to deal with crazed, hormonal, no-Santa fearin' 6th graders.
I love what I do. Really. I mostly love it for a week in March, the months of June and July, and 2 weeks in December. Haha, kidding, kidding. Sort of.
I got this e-mail today and got a kick out of it. Sing it, too, even if you're not a teacher. Don't forget your East Texas 'twang'!!!
(to the tune of "Walking' in a Winter Wonderland")
Children scream, they won't lis-in'.
When they go, we won't miss 'em'.
In all of this pain, we try to stay sane,
Workin' in an element'ry school.
Christmas comes, they're excited,
Though our nerves, they've ignited.
They're off of the walls, they run in the halls,
Workin' in an element'ry school.
In the lunchroom we can hear them yellin'
And we know that they are really wound.
Someone hits the other, says "I'm telling"
And that is when our heads begin to pound.
Pretty soon, we'll be restin'
Cause our nerves, they've been testin'
We're happy it's clear.
It comes once a year.
Christmas in an element'ry school!
--Casey
Wednesday, December 15, 2010
Tuesday, November 9, 2010
Give THANKS!
What a pretty little idea! I can think of a hundred things I'd like to pin on that little string!

Why didn't I think of that??
BTW.......toooootaaaaaaallllllllly stole this idea from www.thecraftingchicks.com

Why didn't I think of that??
BTW.......toooootaaaaaaallllllllly stole this idea from www.thecraftingchicks.com
Saturday, October 2, 2010
Check THIS out.
Want to get your mind BLOWN?? Go to www.mycreativestirrings.blogspot.com and prepare to be there for at least an hour. :)
Local friends, this is Thomas Orsak's wife's blog. She has lots and lots and lots of fun ideas!
Local friends, this is Thomas Orsak's wife's blog. She has lots and lots and lots of fun ideas!
Saturday, September 4, 2010
Pretty Poppies!
I've become quite the pyromaniac with this one... SO fun to make and if I had it my way, I'd surely make this pretty little flower a daily, mandatory, fashion necessity.
Here's how!
1. Cut fabric into various sizes of circles. (You'll need 7 to 10 of them) The more random the better, and the more circles you cut, the fluffier the flower!
 2. Next, burn (yes burn!) the edges of the circles. I've found that a candle is the most efficient way. NOTE: Fabric is EXTREMELY flammable! Keep a cup of water handy in case you get a blazer. lol
  The petals will look like this:
 They'll fluff up like the pic above!
3. Once all of the edges of your circles have been burned, you now have petals! Stack them on top of each other with a little dab of hot glue between each one.

 4. Now, add whatever you want to the middle. A pretty pearl, an old broach, jewels, buttons, whatever you'd like!
5. Hot glue a piece of felt to the back to help with stability. Your pin can be glued to the felt.
6. Snaz up your favorite denim jacket....or purse....or shirt...or skirt....or necklace with one of these things!
I made a red one, too....and I couldn't decide if I wanted it to be a hair clip or pin, so I glued a pin and a hair clip and made them both!
 just in case....save yourself the trouble and don't try to do this with sild! Doesn't work. Just regular ol' fabric works.
Also, can not remember where this idea came from. It's not my own idea. If I remember, I'll add the site!
Thursday, August 12, 2010
The easiest thing you will EVER make. Promise.
While walking through a shop called Hearts and Hands in Katy, TX during my brief stint there a few years ago, I saw this idea and immediately knew it would be one I'd be trying for myself. It is the perfect gift for a teacher...or a mommy...or a secretary....or a ....well, you get the point.
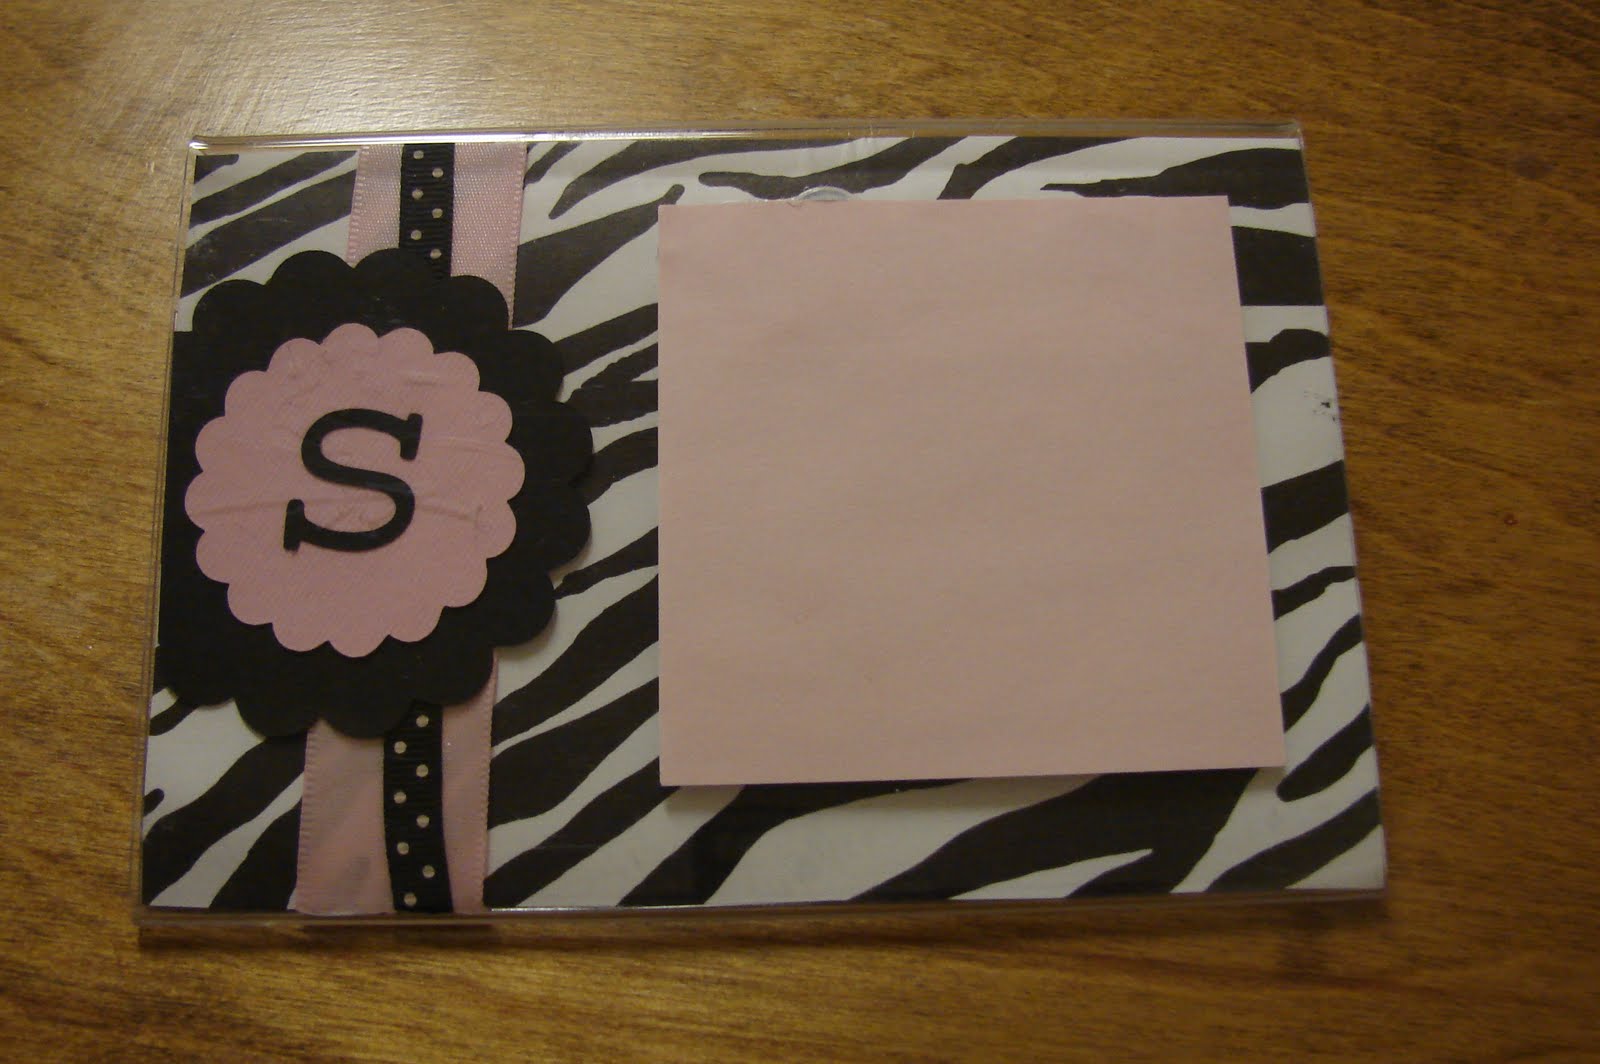
It's quick, it's easy, it's handy, and it's CHEAP! It's......a.......Post-it note holder!!!!!!
 Take a cheap-o plastic 4x6 frame, a little pretty paper to slip inside, some ribbon( if you please), and a post-it note pad, and you've got yourself a handy little spot for all of your note-taking needs. Sometimes I feel like I couldn't survive without post-its!
Here's what it looks like from the side:
 Another variation:
 And some more paper ready to be put to work:

Here are some tips: Don't go the super cheap route like I did and purchase your frames at a "Dollar Store". They are pretty flimsy and "bow" a little when you write on them. Hobby Lobby's are the best I've found ($1.99) and are much sturdier than the others. Also, even the "super sticky" post-its aren't quite sticky enough to stay "stuck" to the frame. A little hot glue works great to keep them secure.
I dazzled mine up a little bit with the help of my Cricut machine (couldn't live without it) but if you don't have one, stickers would work great.
There are some fun post-it note colors these days. Right now, at Wal-Mart, individual packs are just $1!
Easy Peasy! Why didn't I think of that?
It's quick, it's easy, it's handy, and it's CHEAP! It's......a.......Post-it note holder!!!!!!
 Take a cheap-o plastic 4x6 frame, a little pretty paper to slip inside, some ribbon( if you please), and a post-it note pad, and you've got yourself a handy little spot for all of your note-taking needs. Sometimes I feel like I couldn't survive without post-its!
Here's what it looks like from the side:
 Another variation:
 And some more paper ready to be put to work:
Here are some tips: Don't go the super cheap route like I did and purchase your frames at a "Dollar Store". They are pretty flimsy and "bow" a little when you write on them. Hobby Lobby's are the best I've found ($1.99) and are much sturdier than the others. Also, even the "super sticky" post-its aren't quite sticky enough to stay "stuck" to the frame. A little hot glue works great to keep them secure.
I dazzled mine up a little bit with the help of my Cricut machine (couldn't live without it) but if you don't have one, stickers would work great.
There are some fun post-it note colors these days. Right now, at Wal-Mart, individual packs are just $1!
Easy Peasy! Why didn't I think of that?
Wednesday, August 11, 2010
Funky Chunky Recycled Crayons!!!
I don't have the "million broken crayons" problem yet, but it certainly isn't too far away. I did, however, encounter a "million broken crayons" issue when I moved into my new classroom a couple of weeks ago. I threw A LOT of things away, but couldn't bring myself to throw away those crayons. I was on a mission to find a good solution and then I remembered that several months ago, I came across a GREAT idea to solve the problem.
The site: www.makeandtakes.com/recycled-chunky-crayons (gotta give credit where credit is due! :) ) I haven't attempted it YET, but am definitely planning on it. All photos came straight from the site. (Illegal, maybe?) I'm feeling rebellious... haha!
I think you'll LOVE this!
Before you start the fun stuff, preheat your oven to 275 degrees.
FIRST, take all of the paper off of the crayons and break them into small pieces.
THEN, spray a mini (or regular) muffin tin with vegetable spray.
NEXT, place crayons into each spot in the tin, like this:
 Place them in the oven for 7-8 minutes. They'll look a little like this when you do:
 Want swirly crayons? Grab a toothpick and swirl 'em around before they cool!
Let them cool completely before you pop 'em out of the muffin tin.
Looky looky!!
 Those look like WAY more fun than the real things. And I just think they are PERFECT for little chubby clumsy toddler hands.
Here are some other ideas: Melt crayon bits in small paper cups in the microwave for about 4-6 minutes and pour them into ice trays....or candy molds....or decorative ice molds!
I have a star ice tray somewhere that I'm dying to find so that I can give this a shot!!!
What a great idea!!! Why didn't I think of that? :)
p.s....already working on the next idea! The easiest thing you'll ever make - - - PROMISE!
Sunday, August 8, 2010
Here goes nothin'....
I copy ideas.
There, I said it.
I copy ideas a LOT!
Now that THAT'S out of the way, welcome to my new little blog getaway. A work in progress for now, but an idea I dreamed up a couple of days ago while fighting a little insomnia. I do my best thinking when I'm trying NOT to think.
There are MILLIONS of blogs out there with great ideas. BILLIONS of websites, too. I find good ideas all the time and just copy away! This blog, I hope, will be a collection of those great ideas. Sometimes I'll post a pic of someone else's great idea, sometimes I'll post a pic of my own take of someone else's great idea, and sometimes, if I'm feeling productive...:) I'll even post a tutorial!
I'm excited about this. And maybe it's because it's reallllly late and I'm reallllly delirious, but excited. I'm never one to shy away from a chance to be creative!!!
Subscribe to:
Posts (Atom)